Many years ago, I purchase a very sad looking fake tree at Target - and then I decorated it with approximately 3 million lights, and I really do love it.
As with most years, Connor kicked off the decorating with a garland he made during the several months where I pretended he still needed a nap, but rather than sleeping, he hung out in his room for "quiet time". My mom had gifted him the yarn for his birthday, and by December we had an enormous garland. It's the first of the hand made decorations to hit the tree.
Helen followed by placing what is my all-time favorite hand made decoration - the tree she and I made a few years ago. It has almost every color of wool I've ever dyed. It's a nice reminder of a craft I once enjoyed, but have retired due to time constraints.
After we had put on many, but not all, of the ornaments - Ed played the role of family photographer - and it is now that I will point out that the sweater I am wearing was my summer / fall knitting project.
By the end of the season, we had a last ornament to add - a snowman crafted by my mom, that is the perfect partner to the snow(wo)man Helen and I had crafted earlier. His hat is divine. (Thank you, Mom!)
Come tomorrow, we'll be packing this and more up for another year.
Merry Christmas, all.
Elaine
Showing posts with label crafts. Show all posts
Monday, January 5, 2015
Monday, November 17, 2014
The turkey family grows
Over the weekend, our turkey family grew by two. The number of needle felting injuries grew by one, as did the number of children in my home with an ear infection (Helen), and the number of children sporting a fever high enough to stay home for the day (Connor). The number of children who now have a second song memorized on her violin also grew by one. Hopefully I'll capture it on video tomorrow.
Elaine
Elaine
Tuesday, November 11, 2014
Fall Needlefelting
Last night, I stayed up late making my first needle felted turkey. It sits beside a pumpkin Connor needle felted when my parents were in town.
Maybe that turkey and pumpkin will acquire a few friends before Thanksgiving passes.
Elaine
Maybe that turkey and pumpkin will acquire a few friends before Thanksgiving passes.
Elaine
Monday, March 10, 2014
Valentine's Day
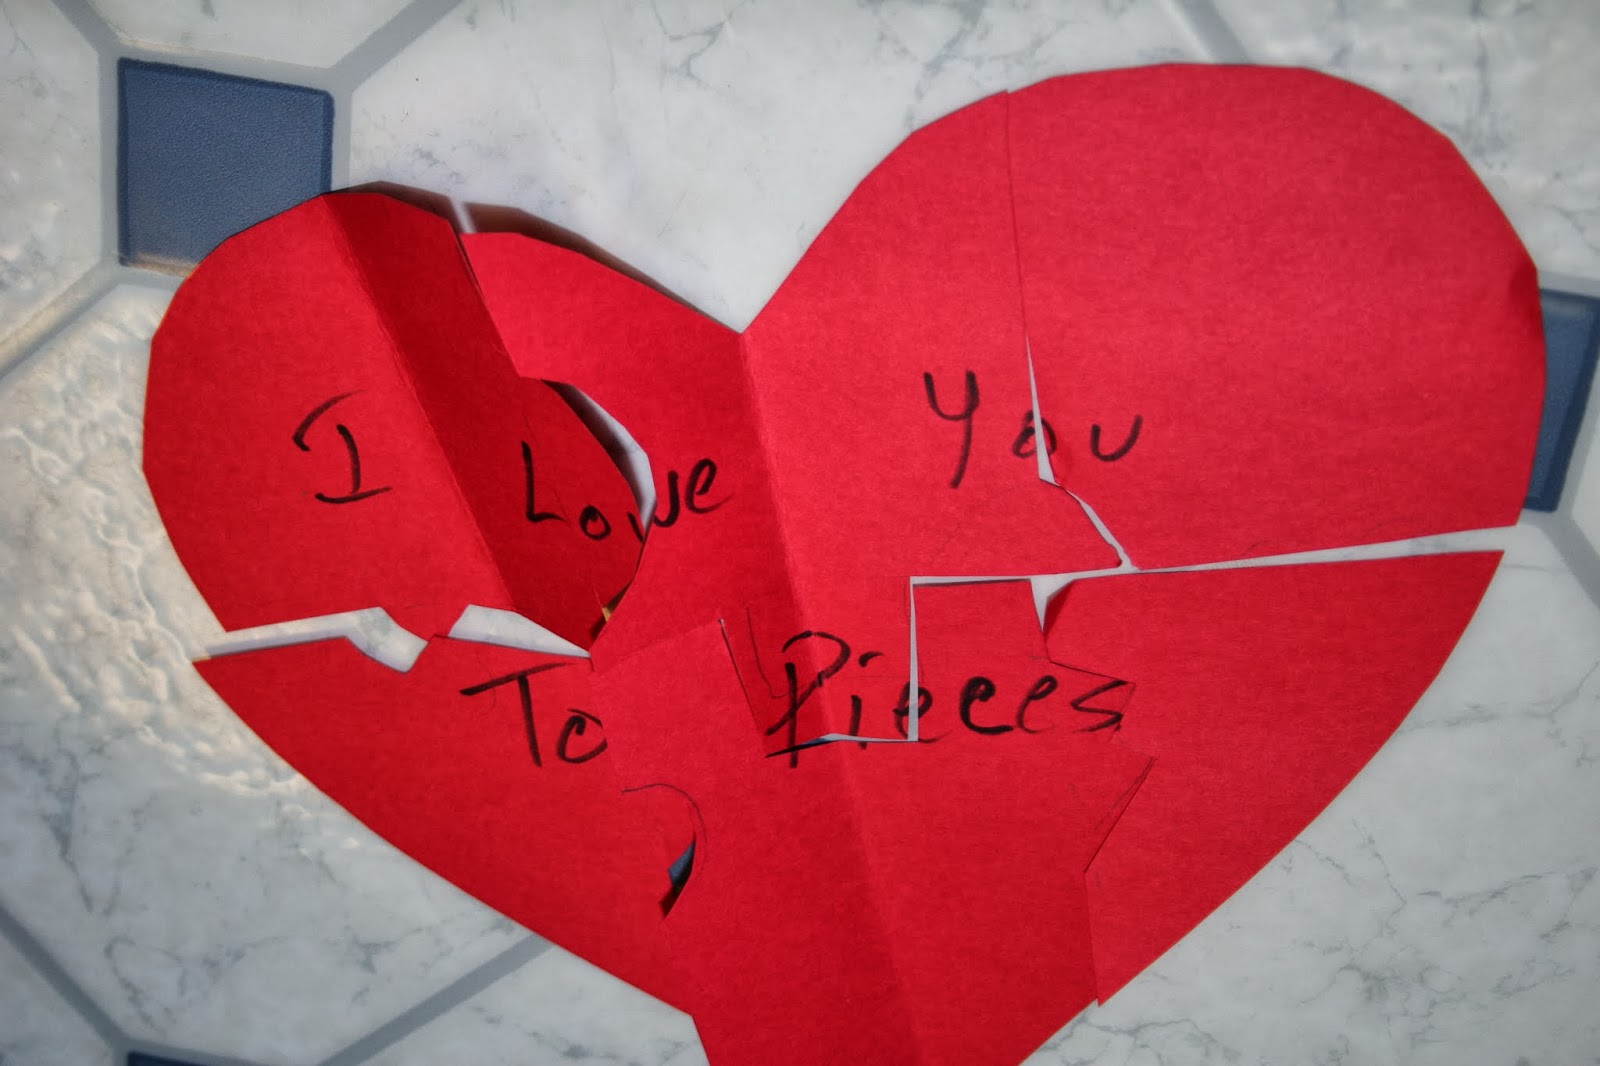
Our traditional exchange of homemade valentines happened again this year. Connor and Helen also diligently worked to make cards for each of their classmates. At Helen's school, Valentine's Day was a planned day off, so there was no official card exchange (so sad), but she still worked with Ed to make valentines for each member of her class. Ed had no idea when he made his great pop-out valentines last year that Helen would request they be mass produced by him this year! But she did.
And so they set about first drawing, then coloring, then cutting, and finally pasting about 20 cards together. They did bring a lot of smiles to Helen's classmates and friends. Connor made Star Wars themed cards with pixie sticks, I made valentines with snowflakes with messages like "I love you SNOW much!", Ed created puzzles for everyone, and our au pair crafted hers out of toilet paper roll tubes. If there had been a contest for fanciest valentine, our au pair would've won.
But that was just the tip of our valentine crafting this year!
We also had a painting day, and when the paintings dried - we cut them into hearts and hung them by the fireplace.
We decorated heart shaped cookies for our neighbors and a few out of town friends.
And finally, my favorite craft of the season were these heart shaped candles. We pressed them out of beeswax, stacked the sheets together, and then strung a candlewick through them after poking a hole through the stacked wax hearts with a bamboo skewer.
We never did burn the candles all the way down. I can't decide whether to leave them out for spring or to squirrel them away for next Valentine's Day!
Elaine
And so they set about first drawing, then coloring, then cutting, and finally pasting about 20 cards together. They did bring a lot of smiles to Helen's classmates and friends. Connor made Star Wars themed cards with pixie sticks, I made valentines with snowflakes with messages like "I love you SNOW much!", Ed created puzzles for everyone, and our au pair crafted hers out of toilet paper roll tubes. If there had been a contest for fanciest valentine, our au pair would've won.
But that was just the tip of our valentine crafting this year!
We also had a painting day, and when the paintings dried - we cut them into hearts and hung them by the fireplace.
We decorated heart shaped cookies for our neighbors and a few out of town friends.
And finally, my favorite craft of the season were these heart shaped candles. We pressed them out of beeswax, stacked the sheets together, and then strung a candlewick through them after poking a hole through the stacked wax hearts with a bamboo skewer.
We never did burn the candles all the way down. I can't decide whether to leave them out for spring or to squirrel them away for next Valentine's Day!
Elaine
Friday, December 6, 2013
Advent Calendar
It seems we hit the ground running with Christmas this year. Connor and Helen (especially Helen) were eager to get the tree up and even more eager to pry their Advent calendars open. We've abandoned the cheap chocolate calendars in favor of the Star Wars Lego Advent Calendar (Connor) and a homemade calendar (Helen). Connor loved his Lego calendar last year (that he purchased himself with birthday money) and Helen doesn't like the cheap chocolates that come in the calendars I used to purchase, so she ended up giving it all away to Connor.
True to form, Connor loves the Lego Star Wars calendar. And, I hate to admit it, but it does provide him with a lot of fun. And really, how much worse is a tiny cheap plastic toy than a piece of chocolate?
Helen's calendar is still incomplete. I purchase a wooden frame that needed to be put together that has 25 cardboard boxes that get pulled out. I had dreams of how this calendar would look. Yes, I had dreams. But, in typical fashion, the dreams were a bit beyond both my capabilities and the time available for the project. So instead of a really awesome and beautiful calendar, Helen got this.
No matter. She's pleased as can be. She even knows several of the items in the calendar, but it doesn't seem to damper her excitement much at all about finding them on their appropriate day. In fact, she even made a couple of the items in the calendar! Several of the items in the calendar are little notes that say "Have a cup of hot cocoa with mom" or "Go on a trailer bike ride with Dad". Connor threw in a few of his own, which I thought was pretty sweet of him. He also had a few little things that would fit in the boxes sitting around, so he gifted them to Helen. Two days ago, she received a shark's tooth that Connor had cast in plaster. The first thing Helen did after opening it was run upstairs and thank Connor. At this age at least, a little something can go a long way.
The first day, Helen opened the supplies to make this tree. I stole the idea from here. I fell in love with it last year, when I first saw it posted, but didn't have the time to execute. Our version has a sample of nearly every color of wool I've dyed over the years. I did the cutting of the wool, and then Connor helped Helen sew it all together. It was the first ornament on our tree.
Importantly, I haven't put numbers on any of the drawers. I wait to do that until the night before when I have a better sense of what I can accomplish the next day. For example, I don't want to give her a ticket to have cocoa with me if I'm going to be gone at bedtime. And likewise, I'm not going to ask Connor to make good on his promise to jump on the neighbor's trampoline with Helen if it's cold and rainy.
So far, so good. Though tonight I'm scheduled to make a popcorn garland for our tree - and I'm a little bit nervous about the mess that's going to follow.
Now...I just need to think of things for the last 8 days of Advent so that Helen doesn't get surprised by the empty boxes!
Elaine
True to form, Connor loves the Lego Star Wars calendar. And, I hate to admit it, but it does provide him with a lot of fun. And really, how much worse is a tiny cheap plastic toy than a piece of chocolate?
Helen's calendar is still incomplete. I purchase a wooden frame that needed to be put together that has 25 cardboard boxes that get pulled out. I had dreams of how this calendar would look. Yes, I had dreams. But, in typical fashion, the dreams were a bit beyond both my capabilities and the time available for the project. So instead of a really awesome and beautiful calendar, Helen got this.
No matter. She's pleased as can be. She even knows several of the items in the calendar, but it doesn't seem to damper her excitement much at all about finding them on their appropriate day. In fact, she even made a couple of the items in the calendar! Several of the items in the calendar are little notes that say "Have a cup of hot cocoa with mom" or "Go on a trailer bike ride with Dad". Connor threw in a few of his own, which I thought was pretty sweet of him. He also had a few little things that would fit in the boxes sitting around, so he gifted them to Helen. Two days ago, she received a shark's tooth that Connor had cast in plaster. The first thing Helen did after opening it was run upstairs and thank Connor. At this age at least, a little something can go a long way.
The first day, Helen opened the supplies to make this tree. I stole the idea from here. I fell in love with it last year, when I first saw it posted, but didn't have the time to execute. Our version has a sample of nearly every color of wool I've dyed over the years. I did the cutting of the wool, and then Connor helped Helen sew it all together. It was the first ornament on our tree.
Importantly, I haven't put numbers on any of the drawers. I wait to do that until the night before when I have a better sense of what I can accomplish the next day. For example, I don't want to give her a ticket to have cocoa with me if I'm going to be gone at bedtime. And likewise, I'm not going to ask Connor to make good on his promise to jump on the neighbor's trampoline with Helen if it's cold and rainy.
So far, so good. Though tonight I'm scheduled to make a popcorn garland for our tree - and I'm a little bit nervous about the mess that's going to follow.
Now...I just need to think of things for the last 8 days of Advent so that Helen doesn't get surprised by the empty boxes!
Elaine
Saturday, November 24, 2012
Fall / Winter Crafts: Week 4 Tooth Fairy Pillow
Connor has watched most of his peers lose teeth, but so far, his are holding on tight, despite his wishes to the contrary. A few weeks ago, I noticed a loose one up front when I brushed his teeth, but wiggling it was painful and Connor is most definitely not into being in pain. Since the excitement of the first loose tooth wore off, Connor has been tenderly avoiding most contact with that tooth, requesting apples be cut into very thin slices and complaining about other foods on occasion.
In anticipation, I made this pillow, with design suggestions from Connor.
Last week, when Connor was in surgery, the anesthesiologist mentioned that occasionally loose teeth get knocked out during surgery, and we assured him this would be fine with Connor. In fact, Connor would like that to happen. It didn't.
On Tuesday, Connor went to his regular dental appointment and the hygienist mentioned that his loose tooth could be pulled out with a little dental floss - but she didn't offer to do the deed. Connor made a bit of an effort to do so on Wednesday night, but to no avail.
I have no idea when the tooth will finally fall out, but I'm pretty sure when it does, the tooth fairy will probably leave this poem. I got the idea from here.
In anticipation, I made this pillow, with design suggestions from Connor.
Last week, when Connor was in surgery, the anesthesiologist mentioned that occasionally loose teeth get knocked out during surgery, and we assured him this would be fine with Connor. In fact, Connor would like that to happen. It didn't.
On Tuesday, Connor went to his regular dental appointment and the hygienist mentioned that his loose tooth could be pulled out with a little dental floss - but she didn't offer to do the deed. Connor made a bit of an effort to do so on Wednesday night, but to no avail.
I have no idea when the tooth will finally fall out, but I'm pretty sure when it does, the tooth fairy will probably leave this poem. I got the idea from here.
This night it is a special night
As fairies dance upon the roof.
All the fairies must alight,
For Connor just lost a tooth!
The Fairy Queen gives her commands-
Twelve bright fairies must join hands
Then together in a circle stands
To guard Connor while he sleeps.
The Tooth Fairy into the circle leaps
The hidden tooth she takes
Ah, but has far to go
Before Connor awakes.
Three times around the world she flies
Over valleys deep and mountains high;
Skirts the storm clouds thick with thunder,
Wings over waves all wild with wonder.
Deep within their earthly homes
Finally she finds the gnomes,
Who upon the tooth must work
Never once their duty shirk.
Some are hammering, hammering, hammering,
Some the bellows blow
Others sweat at the sweltering forge
And then cry out, “Heigh Ho!”
The tooth’s been turned to a shining stone,
A glimmering, glowing gem
The tooth Fairy takes the gnomes’ good gift,
And curtsies to all of them.
Before the sun’s first rays are shown,
She returns to Connor’s bed,
And then - - - away she’s flown!
I've tucked a gem into my coat pocket that will probably look very similar to the gem that appears in the tooth fairy pillow the morning following the lost tooth.
Elaine
Instructions for making a tooth fairy pillow:
Cut out two felt squares approximately 2 inches in length. Sew a small pocket for a tooth onto one piece of felt, and sew a larger pocket that could hold a gem on the other fest square. Embellish as desired. Sew two squares together and stuff with wool.
Saturday, November 17, 2012
Fall / Winter Crafts Week 3: Gnomes
I've had the good fortune to attend handwork group with several other women from Helen's school. We spend a couple of hours after drop-off on Friday to make crafts that will be sold as a fundraiser for the school. The only problem with this is that if I bring home a project that's not quite finished, I'm sure to get a request to make some for Helen. A huge upside to this is that I'm often discovering half-finished projects of my own, and I've been inspired to finish some of them.
This little set of gnomes is the start of a growing collection. I'm planning on hiding them around the house in December as a game for Helen and Connor. I gifted the pink gnome, pictured below, to Helen after Connor's second surgery. Both Ed and I had to miss dinner with her while we waited for Connor to go into surgery. I figured she'd appreciate receiving something I made while waiting for Connor to wake up from anaesthesia.
The how-to is pretty simple.
1. Start with a little wooden peg, like the ones found here.
2. Cut a rectangular piece of felt that can be wrapped around the base of the peg. Glue it in place or sew the ends together to keep it in place.
3. Sew around the neck so the felt will fit snugly and not fall off.
4. Cut a cape to fit the gnome and stitch around the edges and add embroidery to the back if desired.
5. Add some sort of hat and you have a gnome!
This little set of gnomes is the start of a growing collection. I'm planning on hiding them around the house in December as a game for Helen and Connor. I gifted the pink gnome, pictured below, to Helen after Connor's second surgery. Both Ed and I had to miss dinner with her while we waited for Connor to go into surgery. I figured she'd appreciate receiving something I made while waiting for Connor to wake up from anaesthesia.
The how-to is pretty simple.
1. Start with a little wooden peg, like the ones found here.
2. Cut a rectangular piece of felt that can be wrapped around the base of the peg. Glue it in place or sew the ends together to keep it in place.
3. Sew around the neck so the felt will fit snugly and not fall off.
4. Cut a cape to fit the gnome and stitch around the edges and add embroidery to the back if desired.
5. Add some sort of hat and you have a gnome!
Saturday, November 10, 2012
Fall / Winter Crafts Week 2: Lanterns
Every Fall, when the days start to shorten and a chill is sent through the air, my children start going on lantern walks. These walks are inspired by the same practice at first Connor's and now Helen's school.
In preparation for the walks, Connor and Helen get out the lanterns they made in prior years, set to making sure the candle still has some wax left in it, and then choose which lantern will guide them through the darkness.
For the walk at school this year, we were especially lucky. Helen's three youngest cousins were able to join us. And though I was certain this would finally be the year that a small fire would be started by a candle gone astray, especially as we walked through the crunching leaves at a nearby park and not one but TWO children tripped on their walks, not a single leaf caught fire. The little candles glowed through the park and welcomed the season.
This wasn't the first of our lantern walks this year, and it won't be our last.
Making the lantern:
Except one lantern which Connor made by poking nail holes in a tin can, the rest of our set is made from paper.
Take a piece of watercolor paper, cut out shapes, paste tissue paper into those shapes. Form the paper into a tube, add a bottom, wire handle, and then connect that wire handle with a wooden stick. Glue a candle to the bottom and you have a lantern! Helen explained to me that her lantern this year didn't even have shapes cut out of the base paper. Instead, she cut out leaves from tissue paper and attached them to the outside of the lantern with "water glue". Simple, eh - yet always beautiful.
Elaine
In preparation for the walks, Connor and Helen get out the lanterns they made in prior years, set to making sure the candle still has some wax left in it, and then choose which lantern will guide them through the darkness.
For the walk at school this year, we were especially lucky. Helen's three youngest cousins were able to join us. And though I was certain this would finally be the year that a small fire would be started by a candle gone astray, especially as we walked through the crunching leaves at a nearby park and not one but TWO children tripped on their walks, not a single leaf caught fire. The little candles glowed through the park and welcomed the season.
This wasn't the first of our lantern walks this year, and it won't be our last.
Making the lantern:
Except one lantern which Connor made by poking nail holes in a tin can, the rest of our set is made from paper.
Take a piece of watercolor paper, cut out shapes, paste tissue paper into those shapes. Form the paper into a tube, add a bottom, wire handle, and then connect that wire handle with a wooden stick. Glue a candle to the bottom and you have a lantern! Helen explained to me that her lantern this year didn't even have shapes cut out of the base paper. Instead, she cut out leaves from tissue paper and attached them to the outside of the lantern with "water glue". Simple, eh - yet always beautiful.
Elaine
Saturday, November 3, 2012
Fall / Winter Crafts: Week 1 Needle-Felted Pumpkins
At the Fall Festival where Helen attends school, my mom saw some lovely needle-felted pumpkins. I'd been at handwork group the week these were made, and had received a brief tutorial on how to make them from the talented woman who made them. She brings so much to our school. We're lucky to have her!
As soon as my mom and I were able to steal a quiet moment during her visit a few weeks ago, we set to making our own pumpkins.
Step 1. Start with white wool roving and tie a knot. Tie more knots if you want a larger finished product.
Step 2. When you get the pumpkins the size you want, layer white wool roving on top and needle felt them until you get the size and shape you want.
Step 3. Cover with orange roving and needle felt it on top of that.
Step 4. Either use a string to make the ridges of the pumpkin, or spend some time felting in the lines (what my mom and I did).
Step 4. Needle-felt a small green / brown stem and when it looks just about right, add it to the pumpkin.
Not bad for our first try! It's almost given me the confidence to try and make some more complicated animals, which might show up in someone's Advent calendar this year, presuming I get that Advent calendar made!
Elaine
As soon as my mom and I were able to steal a quiet moment during her visit a few weeks ago, we set to making our own pumpkins.
Step 1. Start with white wool roving and tie a knot. Tie more knots if you want a larger finished product.
Step 2. When you get the pumpkins the size you want, layer white wool roving on top and needle felt them until you get the size and shape you want.
Step 3. Cover with orange roving and needle felt it on top of that.
Step 4. Either use a string to make the ridges of the pumpkin, or spend some time felting in the lines (what my mom and I did).
Step 4. Needle-felt a small green / brown stem and when it looks just about right, add it to the pumpkin.
Not bad for our first try! It's almost given me the confidence to try and make some more complicated animals, which might show up in someone's Advent calendar this year, presuming I get that Advent calendar made!
Elaine
Subscribe to:
Posts (Atom)